Affiliate Disclaimer: This post may contain affiliate links, which means I make a small commission off purchases, at no extra cost to you. Read my full disclosure here.
Health & Safety Disclaimer: This post may contain workout and health advice and information, designed for entertainment and/or educational purposes. Without delay, always consult your doctor before trying out a new fitness regimen. Bodyweight MAX should not be used as a substitute for professional medical services.
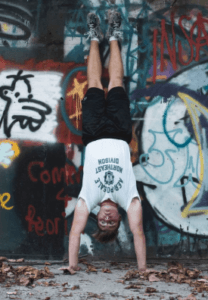
I have lots of goals with my calisthenics training, but the end-all be-all goal I have had since I started was the handstand. Sure, I can do a handstand on the wall. That’s what this post will be about. But I hope that someday all those wall handstands pay off, and that I can do a lengthy handstand without the wall. The fear is my biggest obstacle – the handstand is a very psychological calisthenics move! But the two main reasons people do handstands on the wall for their progressions are because:
A. They lack the upper-body strength to hold themselves up with their arms. The wall takes a lot of your weight off your shoulders – literally.
B. They lack the balance to keep themselves from falling over. The wall keeps you upright to prevent falling.
I have the strength to hold a handstand, but I still lack the balance. It is a long time coming! The longest I’ve held a handstand without the wall is six seconds. Um… Yay me?
Two Ways to Do a Wall Handstand – Practice Them Both!
1. Facing The Wall
(Note: Newcomers may want another person close by when they do this move to prevent possible injury)
I find this overall to be the harder wall handstand, but it is probably better to start with this version since it can help you gauge your strength. You essentially have to walk backwards on your hands with your feet climbing the wall behind you. It is an intense move that really challenges your upper body.
- With a yoga mat on the floor, lie on your stomach, feet pressing the wall.
- Place your palms flat on the mat beside your head and place your feet flat against the wall behind you.
- Do a push-up and remain in the “up” position.

- Now for the hard part. Move your hands backward in a “walking” motion while “walking” your feet up the wall.
- This is your test of strength. How far back can you walk? The goal is to be completely upright, with your toes being the only part of your body that actually touch the wall. Your legs, stomach and face should be very close to the wall without touching it.
- If you can’t get all the way upright, do not worry! This is a tough move. You may want to only walk back to a 45-degree angle. You can also hold a position like the image to the right.
- Hold yourself in this position for 10-to-30 seconds. Don’t overdo it! Know your limits.
- Slowly walk your hands forward on the mat while walking your feet down the wall to return to your original position.
2. Back Against The Wall
(Note: Newcomers may want another person close by when they do this move to prevent possible injury)
This move is a good way to gauge your balance as well as strength. It is more about explosive momentum to get your feet all the way into the air. You have to be careful with this one when you are starting out! Read below to understand how to do it safely.
- With a yoga mat on the floor, get into a pushup position with your head close to the wall.
- Lift one leg up (squeezing your glute), and with the floored leg, do a couple of light “practice” kick-ups. Do not kick hard enough to lift yourself up yet! I just recommend doing this to prep/gauge your strength so you don’t kick too much or not enough.
- Now, kick-up hard enough to lift both legs into the air.
- This is your test of balance. How hard did you kick up? If you kicked too hard, your feet may slam into the wall. You don’t want that! What if the wall wasn’t there? If you didn’t kick hard enough, your feet will fall back towards your starting position.
- The goal is to have your feet lightly tapping the wall only when you need them to, and not to have them constantly against the wall. Your balance won’t improve nearly as much if you simply prop yourself against the wall instead of only tapping it lightly with your foot to regain balance.

- Hold this position for 10-to-30 seconds. Don’t overexert yourself!
- Gently push with your foot to move your body back so that you land softly on your feet, back to the starting position.
- Once you improve this move, try slowly bending one leg at a time while you hold the position. Have each leg bent for half the time you hold the wall handstand. This will further enhance your balance.
I hope this tutorial helps you understand both ways to do a handstand on the wall. These are mainstays in my workouts, and eventually I hope I don’t need a wall at all. Once I overcome the fear and have better balance (and more space to practice), I will be sure to report back! Feel free to post your handstand progress below! Good luck, be safe, and have fun.


