Affiliate Disclaimer: This post may contain affiliate links, which means I make a small commission off purchases, at no extra cost to you. Read my full disclosure here.
Health & Safety Disclaimer: This post may contain workout and health advice and information, designed for entertainment and/or educational purposes. Without delay, always consult your doctor before trying out a new fitness regimen. Bodyweight MAX should not be used as a substitute for professional medical services.
Hollow Body
In my never-ending mission to achieve six-pack abs that I can fry an egg on, I have come to truly believe there is just a handful of ab workouts without equipment that can achieve everything you want for your abdominal muscles. In this post I will talk about and demonstrate the progressions for one of my favorites: The Hollow Body. The truth is, there are SO MANY core exercises that you can do. It isn’t easy to narrow them down for a single blog post. So for now, I will just show you the Holly Body, and save the other great ones for another post.
I always like to emphasize that, while you can dedicate an entire workout to your abdominal muscles, I prefer to integrate just a couple ab workouts into every single workout I do. This has allowed me to slowly strengthen my core over the long-term while still dedicating myself to the rest of my muscle areas during my workouts. Check out variations of the Hollow Body, one of my favorite ab workouts without equipment, below:
Progression 1: Lying Tucked Knee Hold
As you will see with this post, most of these ab workouts only require you to be on the floor (again, no equipment). That said, this first progression of the Hollow Body is an excellent starting point for beginners – not just for the hollow body hold, but for pretty much all of the other ab workouts in this post as well.
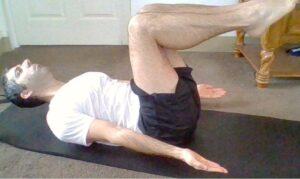
Step 1: Lie flat on the floor.
Step 2: Place your hands by your hips, palms down.
Step 3: Push down on the floor with your hands.
Step 4: Make sure your lower back is flat on the floor! This is the most important part, because it engages your abdominal muscles when it’s time to lift your legs.
Step 5: Slowly lift your knees up towards your chest. Keep your lower back on the floor.
Step 6: Hold this position for 20-30 seconds. For an extra challenge, do as I do in the photo, and lift your arms slightly, with your palms facing up.
To Progress to #2: While holding the position, slowly unbend your knees as much as you can before you start shaking. Every time you do this move, try to extend your legs more and more, until you are essentially doing Progression 2 (below).
Progression 2: Lying Leg Lift Hold
This second progression can be done once the first has become too easy. A good way to tell is to hold the knee hold position, and slowly extend your legs out.
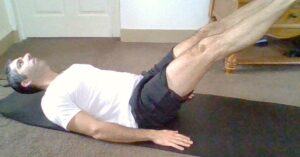
Step 1: Lie flat on the floor.
Step 2: Place your hands by your hips, palms down.
Step 3: Push down on the floor with your hands.
Step 4: Keep your lower back flat on the floor! Sound familiar so far?
Step 5: Keeping your lower back on the floor, slowly lift your feet up while keeping your legs straight. For an extra challenge, lift your head and shoulders off the floor, as well.
Step 6: Hold this position for 20-30 seconds.
To Progress to Hollow Body Hold: A good starting point to make sure you are ready for the next progression is to perform the extra challenge in Step 5. Once you aren’t shaking, you can also extend your arms outward instead of having them at your side. Finally, once you are able to, move your arms up behind you. As far as the static holds go, this would mark the final step before a true Hollow Body Hold.
Progression 3: Floor Leg Lifts
This progression requires the strength of the leg lift hold, but instead of a static hold, you need a different type of strength to repeat the motions. It is challenging at first, but once you have the correct form you will feel intense muscle burn in the core.
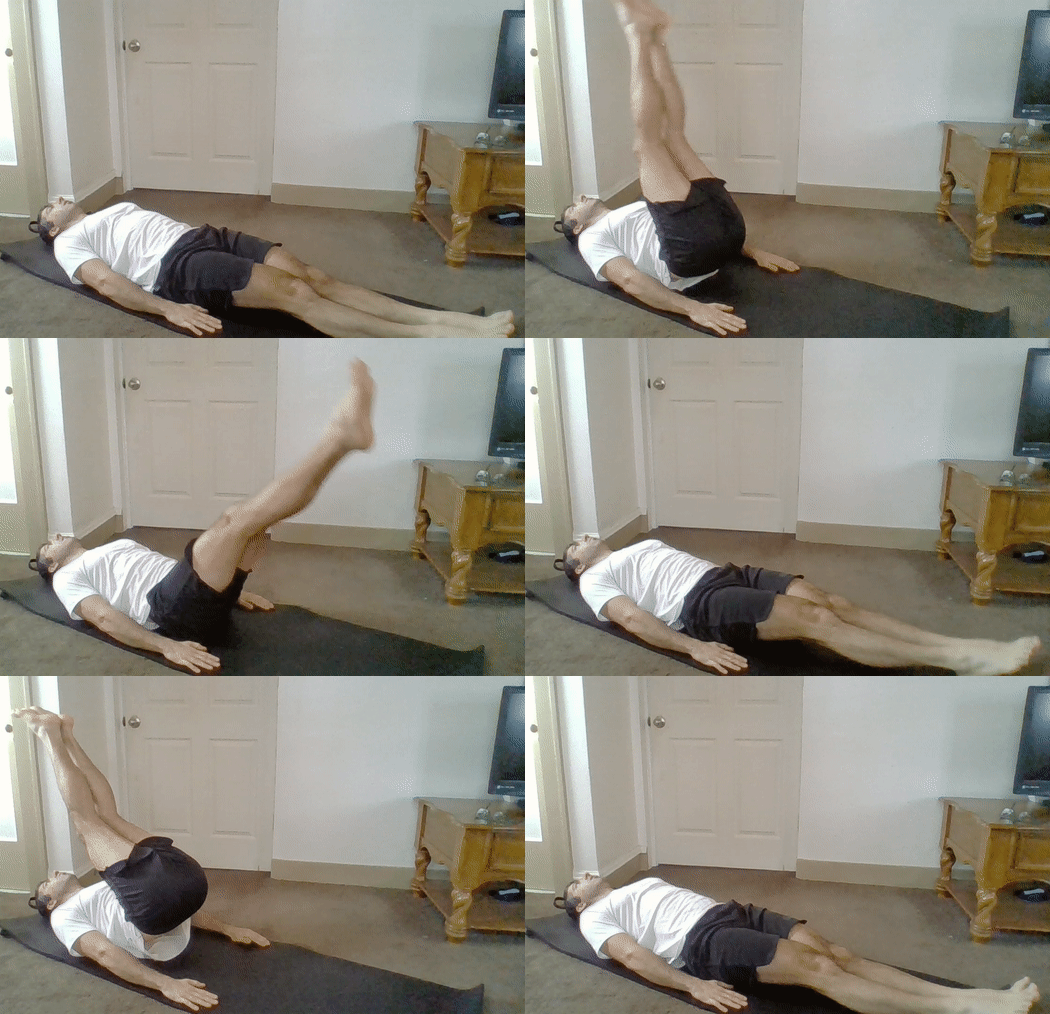
Step 1: Lie flat on the floor.
Step 2: Place your hands by your hips, palms down.
Step 3: Push down on the floor with your hands.
Step 4: Keeping your lower back on the floor, slowly lift your feet up while keeping your legs straight. For an extra challenge, lift your head and shoulders off the floor, as well. Bring your feet up and back as far as you can go. You can even lift your butt up for more challenge.
Step 5: Slowly lower your feet back down, keeping your legs straight. Try not to let your feet hit the floor until you complete all the reps.
Step 6: Repeat this motion 10-20 times.
Progression 4: Hollow Body Hold
This third progression with the Hollow Body, and final progression for static holds, is not easy. But it does wonders for your stomach! Furthermore, the Hollow Body Hold also helps with balance in ways you wouldn’t expect.
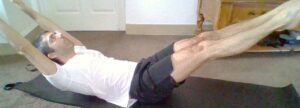
Step 1: Lie flat on the floor.
Step 2: Reach your arms up so they are lying on the floor with your palms facing up.
Step 3: Remember to keep your lower back flat on the floor, although this will happen naturally once you actually do the hold itself.
Step 4: Slowly lift your feet up while keeping your legs straight. A good goal is to try and hit a 45-degree angle.
Step 5: Lift up your arms enough to mirror the angle of your legs. Keep all four of those limbs straight!
Step 6: Engaging your core and lower back, lift up your chest, shoulders, and head. Now, just your lower back should be touching the floor.
Step 7: Hold this position for 20-30 seconds. For an extra challenge, try to slightly rock your body to and fro as you hold.
Progression 5: The V-Up (AKA Jackknife)
This final progression requires all the strength of a hollow body combined with the motion of the floor leg lifts. It is a great way to strengthen your core, improve coordination, and overall helps with other tough calisthenic movements, such as the handstand and L-sit.
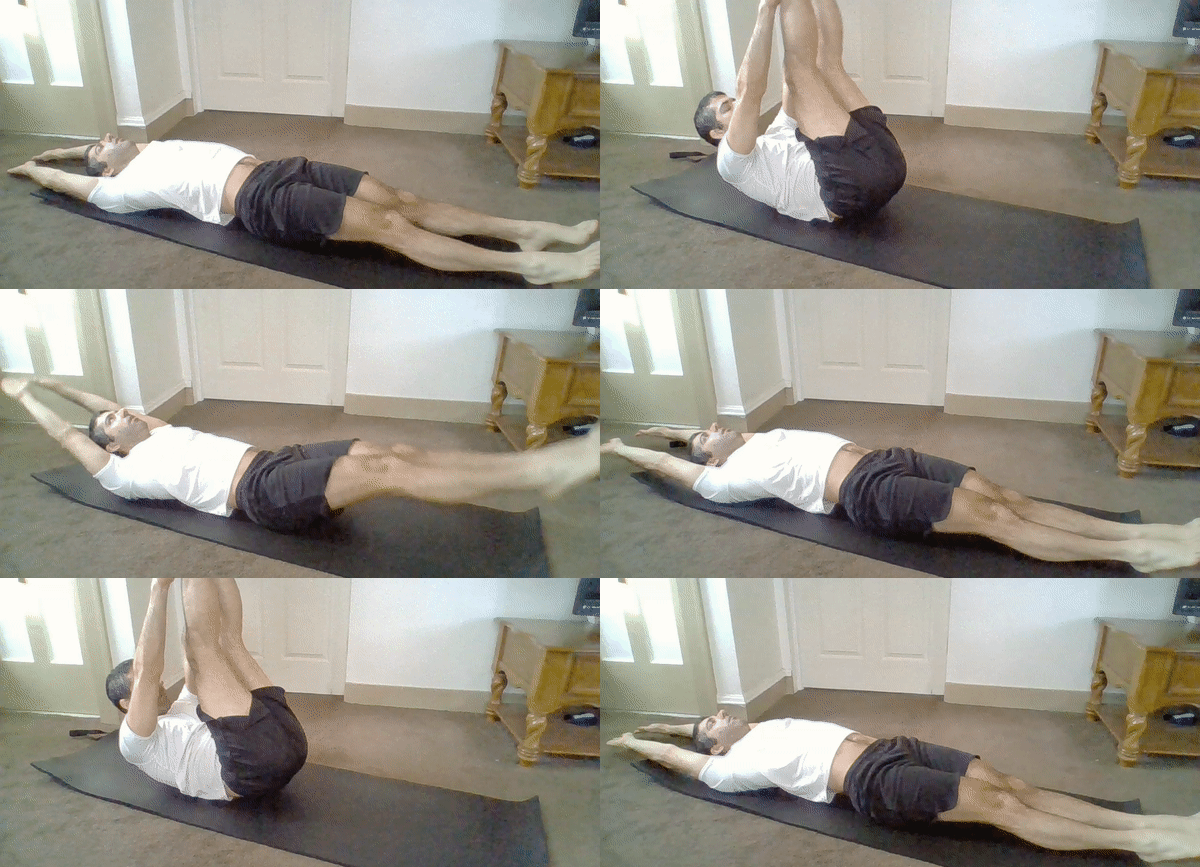
Step 1: Lie flat on the floor.
Step 2: Reach your arms up so they are lying on the floor with your palms facing up.
Step 3: Remember to keep your lower back flat on the floor.
Step 4: Slowly lift your feet up while keeping your legs straight, slightly hovering over the floor.
Step 5: Lift up your arms enough to mirror the angle of your legs, keeping everything straight.
Step 6: Engaging your core and lower back, lift up your chest, shoulders, and head. Now, just your lower back should be touching the floor.
Step 7: Simultaneously lift your legs and arms so that your hands and feet reach toward each other. Depending on flexibility, you should try and touch your toes. Unlike the hollow body hold, you do not want to rock back and forth. Try to use your lower back as an anchor that keeps your core completely stable.
Step 8: Repeat 10-20 times.
Hollaback at the Hollow Body
As far as ab workouts without equipment go, you can’t go wrong with the Hollow Body variations! Once you’re strong enough, I would suggest making Progressions #4 and #5 staples in your workouts. You don’t have to do a crazy amount of reps – consistency is key. And remember to stretch!
Do you have your own favorite ab workouts without equipment? Any ideas or requests? Leave me a comment below!

